Enable any not officially supported Intel Ethernet Adapter in Windows Server
This guide explains how to “hack” drivers Setup Information file and permit installation of excluded hardware from Vendor. This tutorial is targeted to install not supported Intel I219-V (2) Ethernet Adapter situated on MB from ASUS with chipset Z170 (Intel Socket 1151) on Windows Server 2016.
- Start CMD as admin and run following commands:
bcdedit -set loadoptions DISABLE_INTEGRITY_CHECKS
bcdedit -set TESTSIGNING ON
- Reboot server
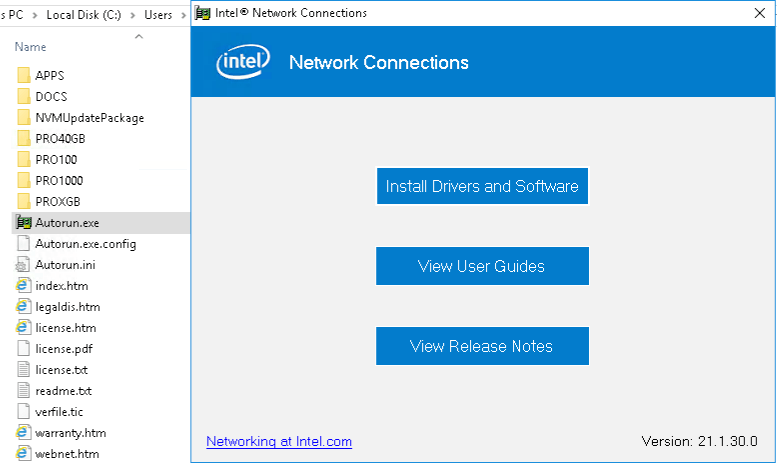
- Download Intel® Ethernet Adapters Connections CD and unpack them
- Get your Hardware ID Ethernet adapter:
- Start CMD and type devmgmt.msc
- Locate your NIC adapter and right click > Properties > Details > Hardware Ids

- In this case our Specific hardware ID is: PCI\VEN_8086&DEV_15B8&SUBSYS_86721043
- Now we will search for Global hardware ID string “VEN_8086&DEV_15B8” in which .inf file is situated
- Run Powershell

Get-ChildItem -recurse | Select-String -pattern "VEN_8086&DEV_15B8" | group path | select name
- Here is output:
Name
----
C:\Users\Administrator\Downloads\21_1_cd\PRO1000\Win32\NDIS62\e1d6232.inf
C:\Users\Administrator\Downloads\21_1_cd\PRO1000\Win32\NDIS63\e1d6332.inf
C:\Users\Administrator\Downloads\21_1_cd\PRO1000\Win32\NDIS64\e1d6432.inf
C:\Users\Administrator\Downloads\21_1_cd\PRO1000\Win32\NDIS65\e1d6532.inf
C:\Users\Administrator\Downloads\21_1_cd\PRO1000\Winx64\NDIS62\e1d62x64.inf
C:\Users\Administrator\Downloads\21_1_cd\PRO1000\Winx64\NDIS63\e1d63x64.inf
C:\Users\Administrator\Downloads\21_1_cd\PRO1000\Winx64\NDIS64\e1d64x64.inf
C:\Users\Administrator\Downloads\21_1_cd\PRO1000\Winx64\NDIS65\e1d65x64.inf
- We should now decide which version of driver to modify and after install.
| Driver version | Windows Desktop OS version | Windows Server OS version |
|---|---|---|
| NDIS62 | Windows 7 | Windows Server 2008 R2 |
| NDIS63 | Windows 8 | Windows Server 2012 |
| NDIS64 | Windows 8.1 | Windows Server 2012 R2 |
| NDIS65 | Windows 10 | Windows Server 2016 |
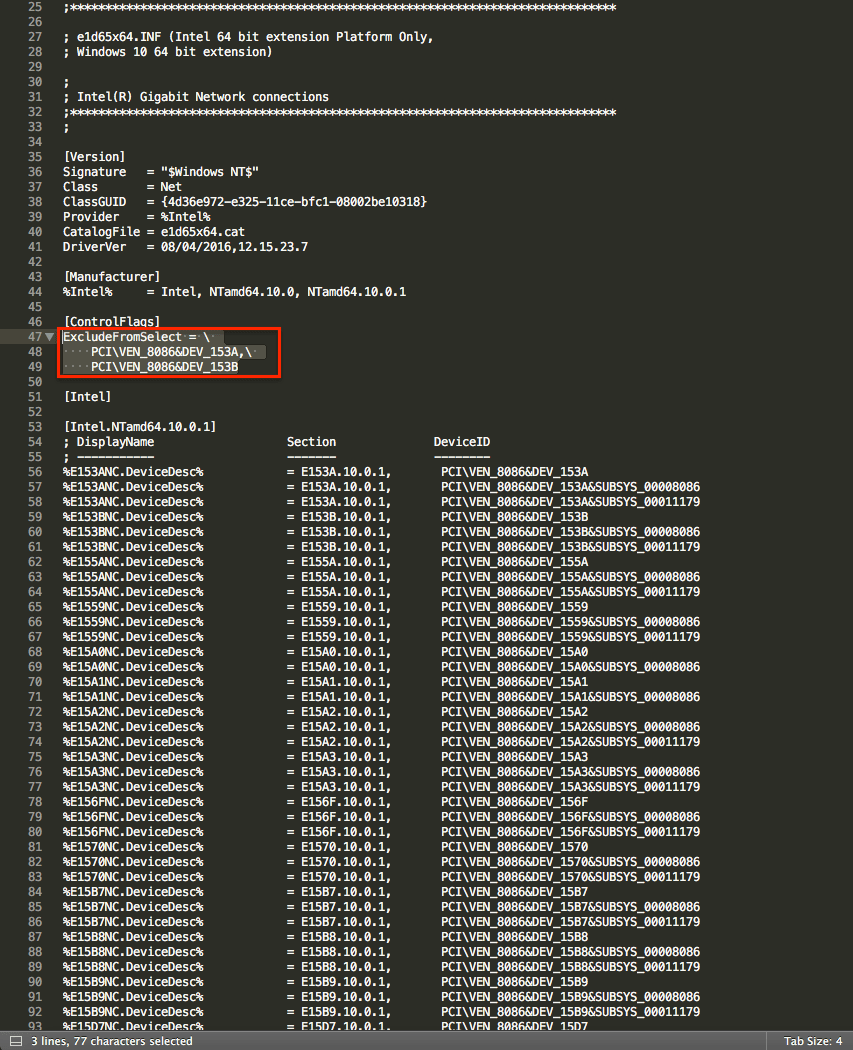
- Now open desired .inf file in notepad or any other text editor (In this case NDIS65 Winx64)
- At the first look for string “ExcludeFromSelect”. If you will see your HW ID here, just remove the line beginning “ExcludeFromSelect = \ ” and ending with last HW ID (not applicable in this case).
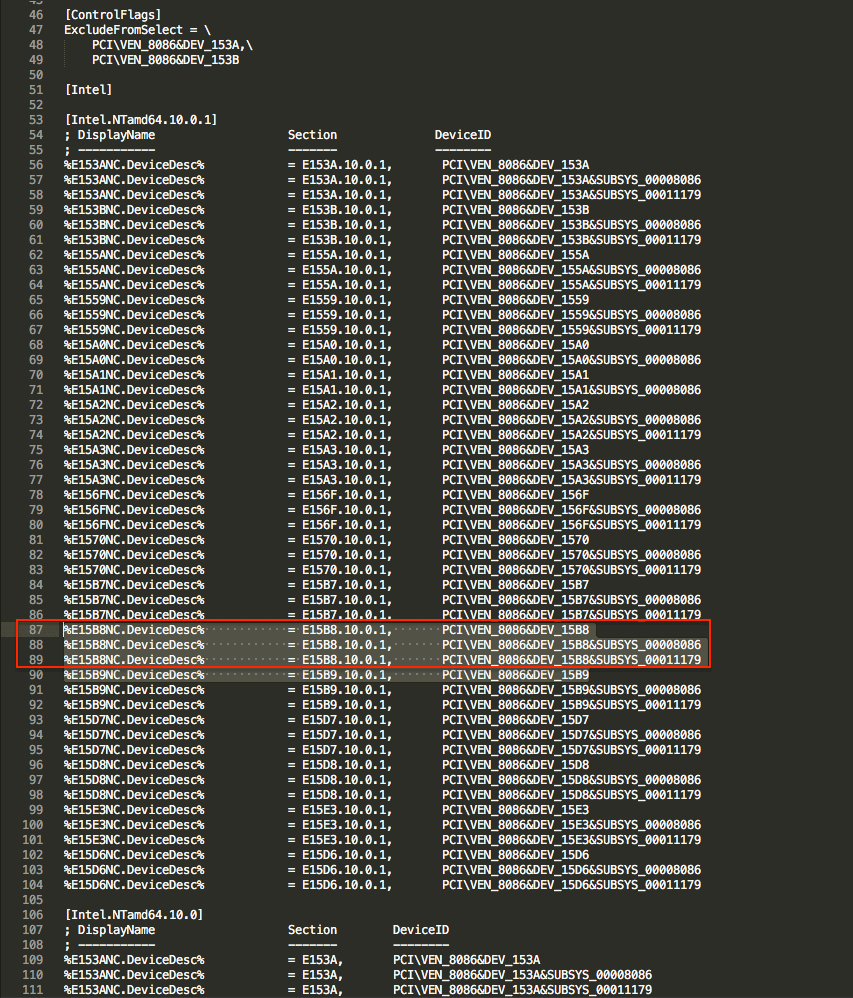
- Then look for your Global Harware ID (In this case “VEN_8086&DEV_15B8”) – it will be located inside section [Intel.NTamd64.10.0.1]. After you find it copy all lines with this HW ID identifier
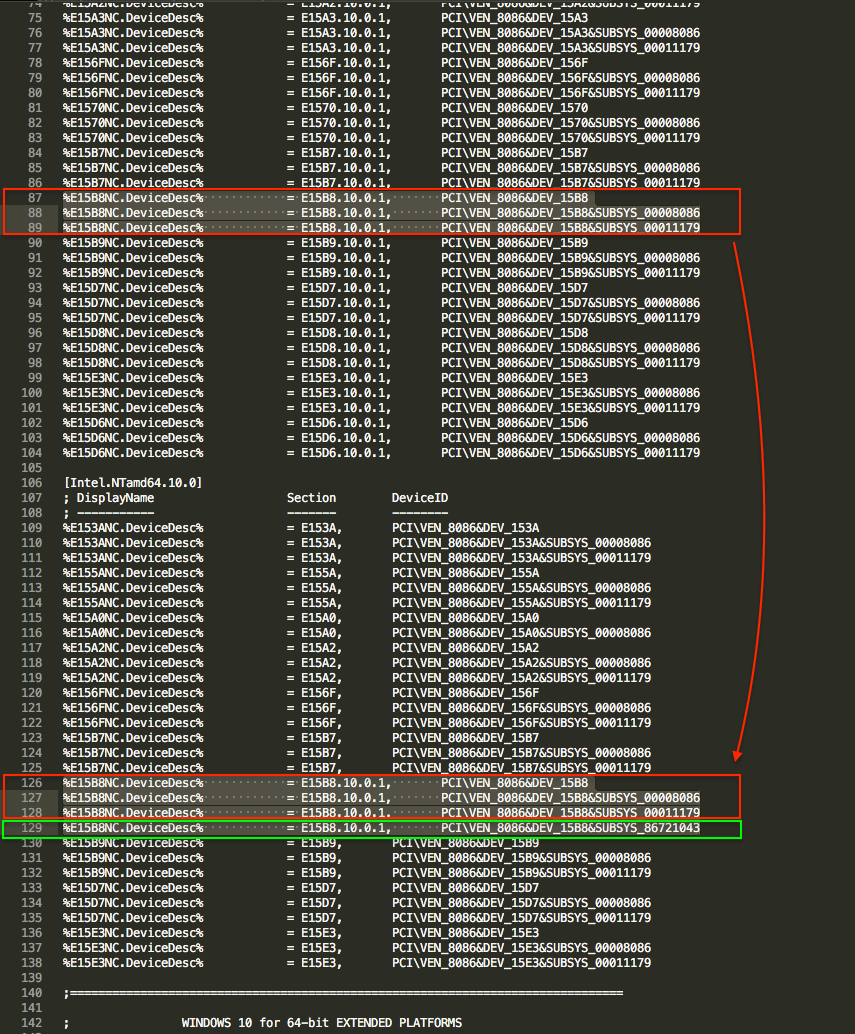
- Now scroll down to next section below [Intel.NTamd64.10.0] and paste previous copied lines after last PCI\VEN_8086&DEV_15B7&SUBSYS_XYZ HW ID (See next picture with red rectangle where arrow points)
- Last important part – If we can’t find our Specifid hardware ID, fill it manually after red rectangle where arrow points – “PCI\VEN_8086&DEV_15B8&SUBSYS_86721043” (See next picture with green rectangle)
- At the first look for string “ExcludeFromSelect”. If you will see your HW ID here, just remove the line beginning “ExcludeFromSelect = \ ” and ending with last HW ID (not applicable in this case).
- Save the .inf file and start with installation of drivers
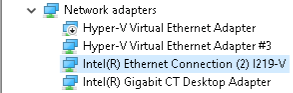
- If you followed steps correctly (or modified according to your NIC) you should see properly installed driver in devmgmt.msc:
- Last step is to Enable Integrity checks + disable TESTSIGNING mode & Reboot
bcdedit -set loadoptions ENABLE_INTEGRITY_CHECKS
bcdedit -set TESTSIGNING OFF
- You can download original & modified e1d65x64.inf here: e1d65x64.inf_before_after
Historical Comments
These comments were imported from the original WordPress post.
Matt — June 27, 2017 at 12:00
Thank you kindly! I didn’t check to see if the networking driver was compatible before I installed the OS, my bad.
This was really helpful 😀